Whip up these quick and easy, beginner friendly colorwork socks in a weekend. The Shimmer Socks, are a fun and free easy colorwork socks knitting pattern! Scroll down for the full free knitting pattern or purchase the ad-free PDF here.
This post may contain affiliate links. In the event of a sale, I get rewarded a small commission, at no extra cost for you. These funds help me keep my blog up and running to provide you with great content and free patterns so thank you!
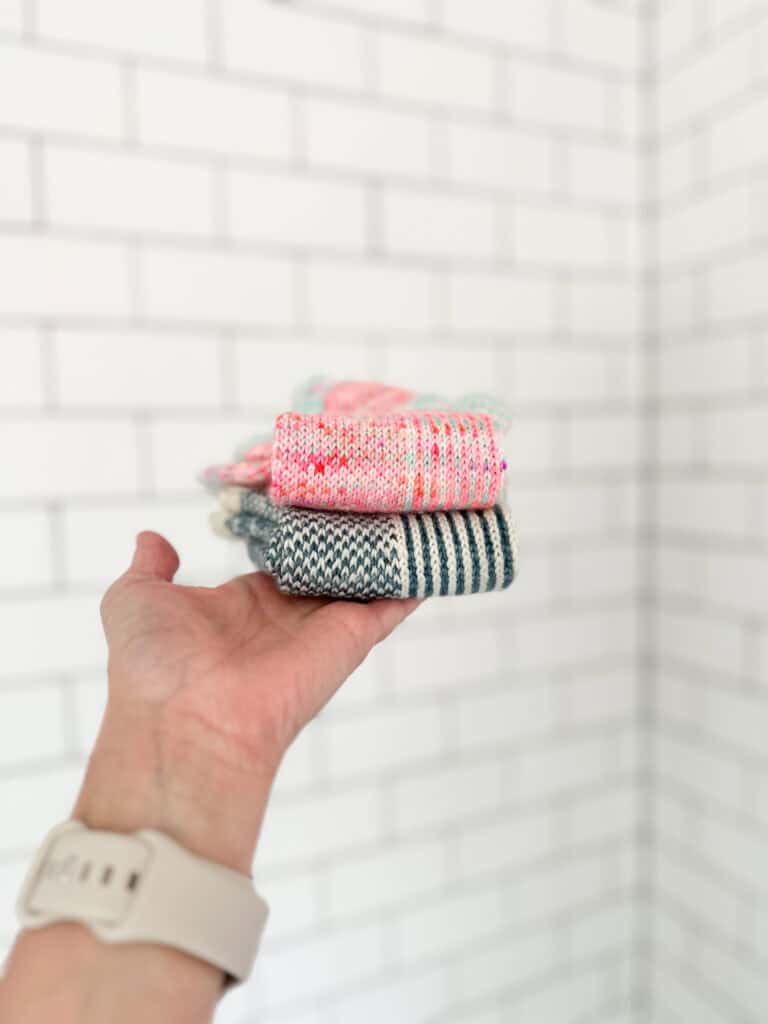
PIN TO PINTEREST!
How to Knit Socks
There are many different ways you can knit socks. I have found that a top down sock with an afterthought heel to be the easiest beginner friendly way. Which is why I chose that construction for both my Saguaro Blossom Socks and this Free Easy Colorwork Socks Knitting Pattern, the Shimmer Socks.
Steps to knitting a top-down sock with an afterthought heel.
- Cast on sock cuff stitches and join in the round.
- Knit the cuff and leg.
- Place waste yarn where the heel will later go.
- Continue knitting the foot.
- Decrease to shape the toe.
- Graft the toe stitches together.
- Place heel stitches onto kneedles.
- Knit the heel.
- Done!
TIP: I typically like to place the waste yarn for the heel. Knit a little more of. the foot. Then knit the heel so I can try on the sock to make sure I get the correct length.
VIDEO: Grafting – How to do the Kitchener Stitch
Find a printer-friendly PDF version of the Shimmer Socks here in my Etsy shop. The PDF version includes the full ad-free pattern that’s easy to print and stick in your project bag!
Keep scrolling for the FREE version of the Shimmer Socks Knitting Pattern.
Best Yarn for Knitting Colorwork Socks
There are a few things to keep in mind when choosing yarn for colorwork socks.
- Fiber Content: I find that using natural fiber yarn is best when knitting socks because it’s breathable and moisture wicking. This means your feet will sweat less and be more cozy. Also having a touch of nylon will make the yarn more durable.
- Ply and Twist: Yarn made specifically for socks typically has a tight twist. This makes the socks more durable. It also keeps them from forming holes less quickly.
- Color and Value: Solid color yarns allow the colorwork design to stand out, whereas variegated yarns can sometimes get lost or muddy. If you want to use a variegated yarn I recommend making sure it is very different than the other color you are using in regards to it’s value. To understand this concept better I have a helpful video linked below.
VIDEO: Choosing Yarn for Colorwork Knitting
I’ve included some of my favorite sock yarns to use for colorwork knitting below.

Solid vs. Variegated Yarns for Sock Knitting
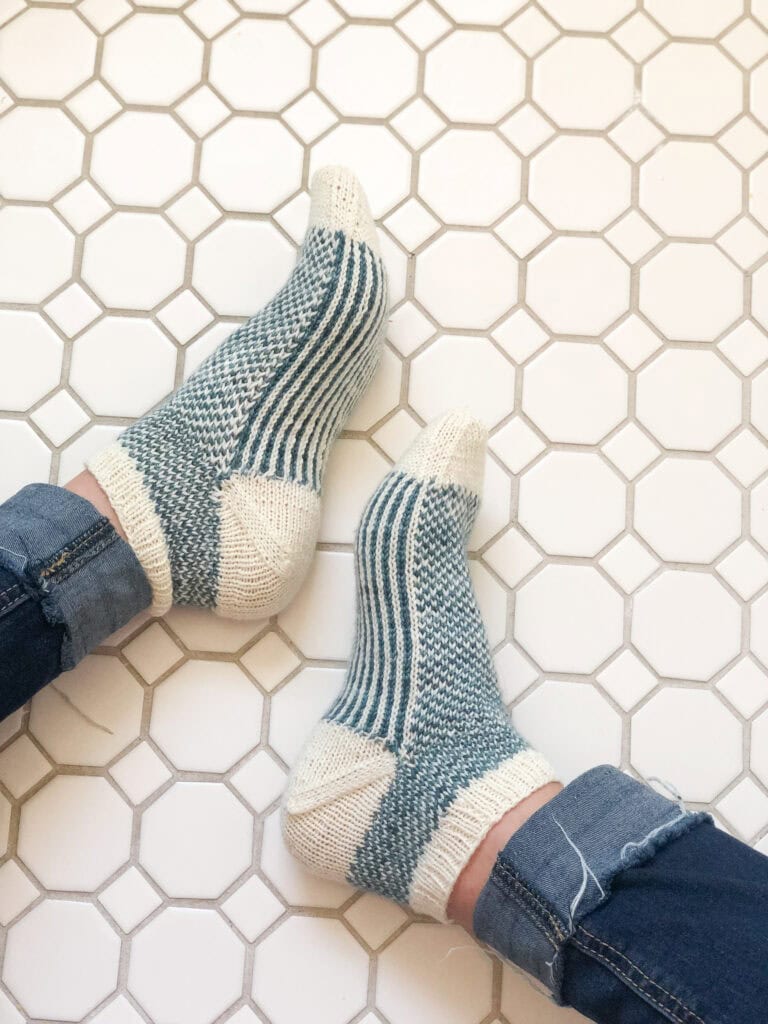
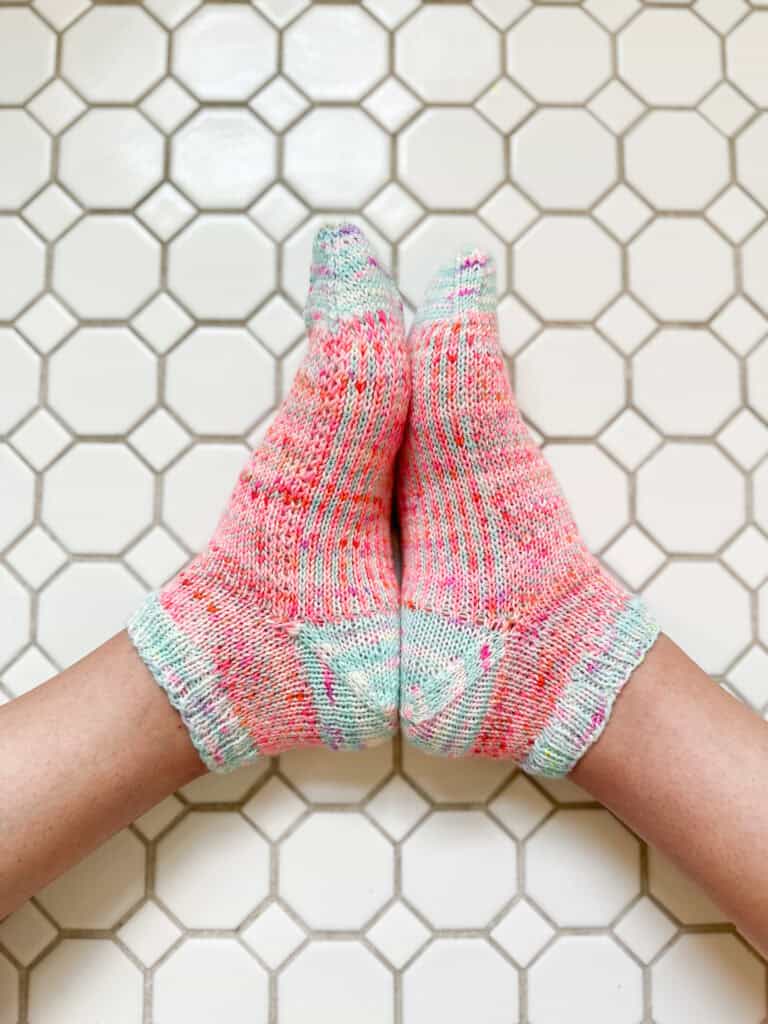
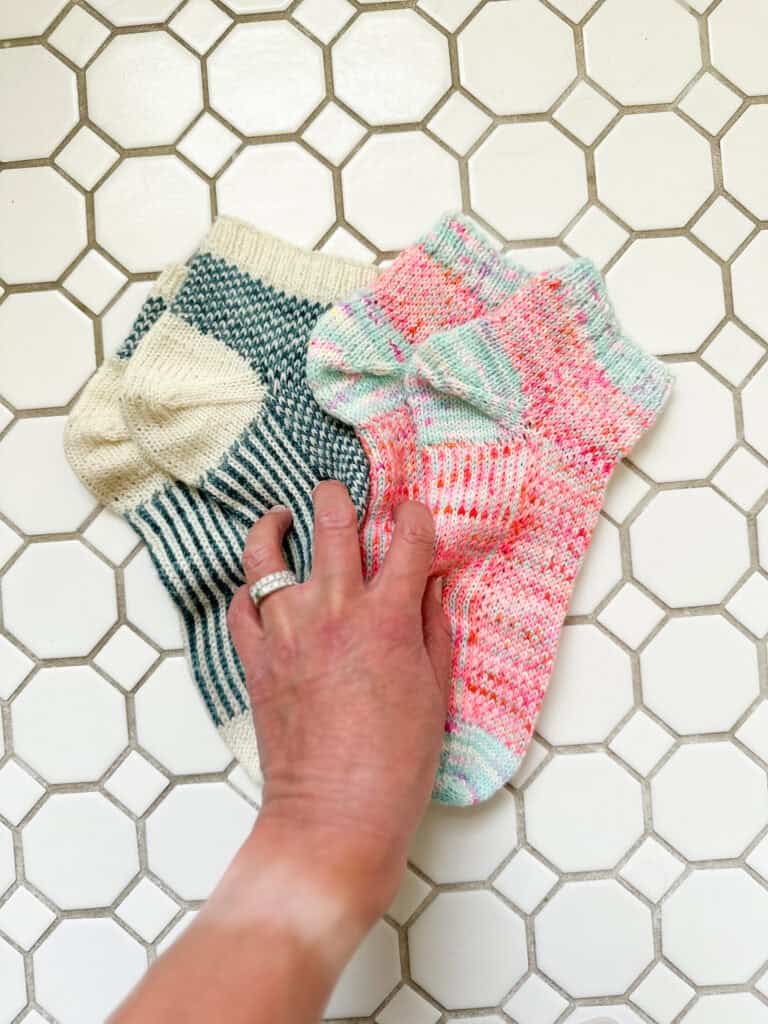
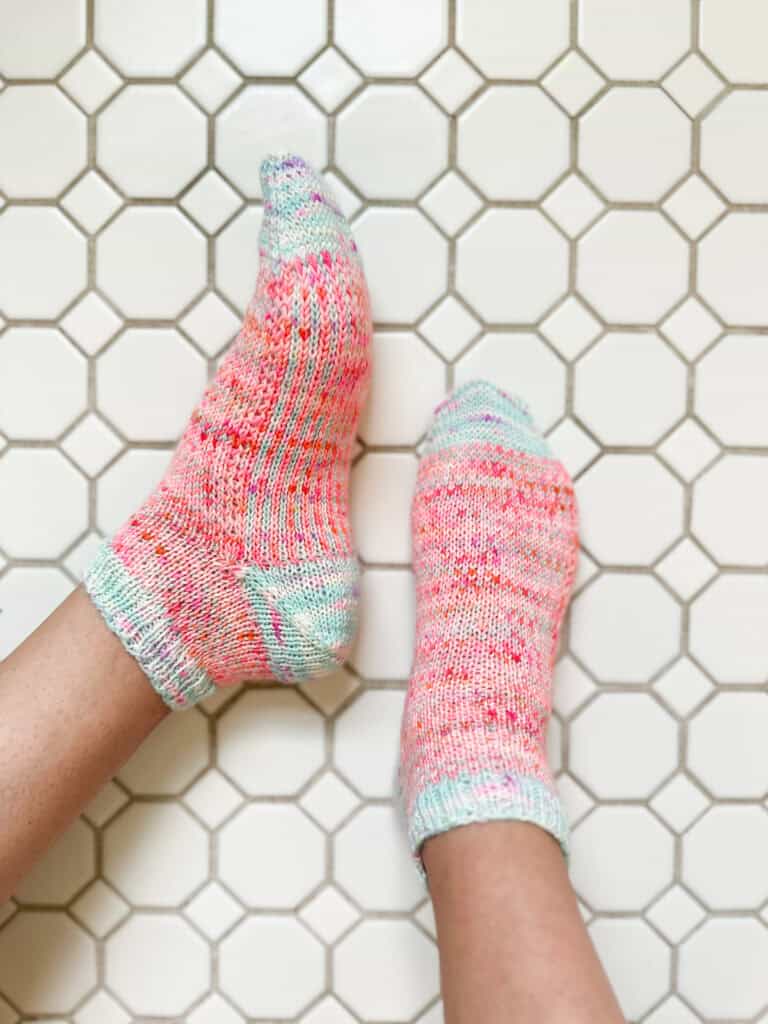
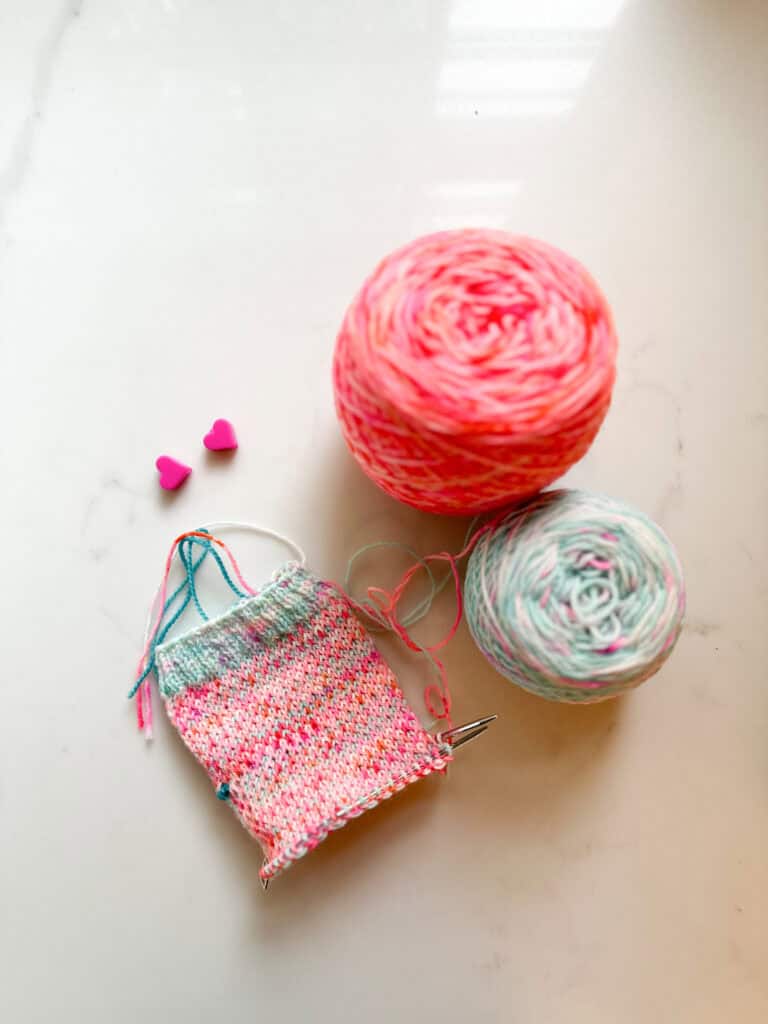
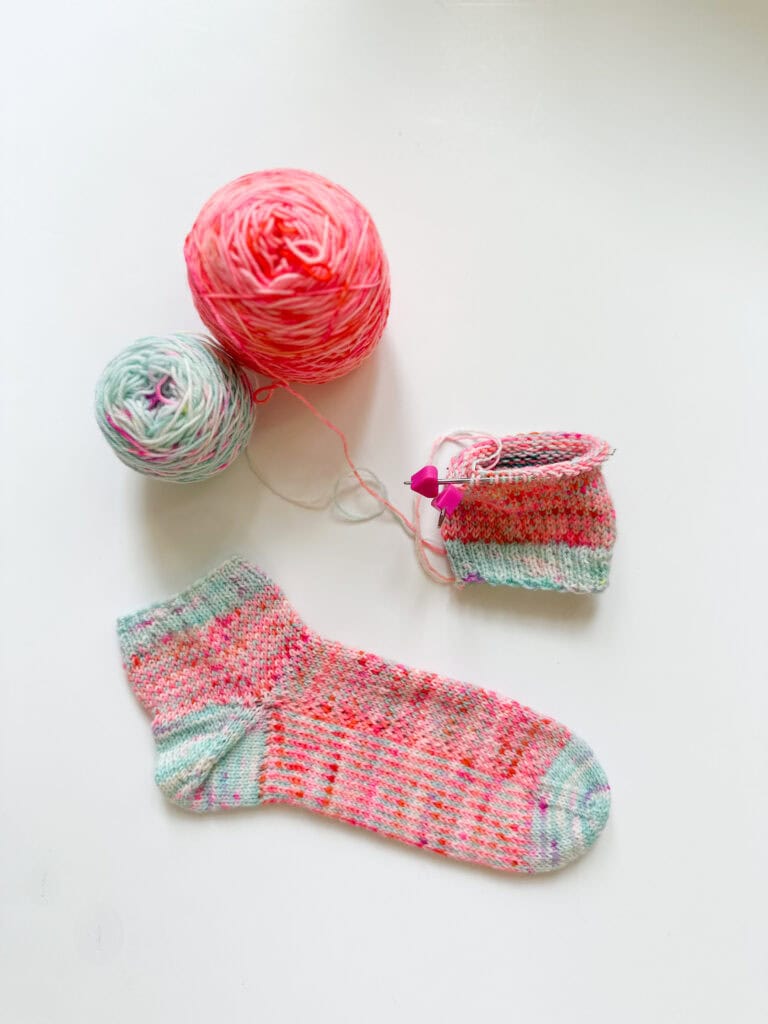
For my original Shimmer Socks I used 2 solid colors so that the colorwork would really stand out. Then I decided to try and use two variegated yarns from my favorite dyer Summer Camp Fibers to see what that would look like. The Colorwork is a little more subtle but the overall shimmer effect is still there. I love both options!
Use my code WHIMSYNORTH at check-out to receive 10% off your Summer Camp Fibers order! Click here to shop.
Budget friendly Sock Yarn for Knitting
Sock yarn can come in a multitude of price points. These are my favorite budget friendly yarns for socks.
- Knit Picks – Stroll (This is the yarn I used for my socks. I love that there are tons of colors to choose from and it’s very soft.)
- Knit Picks – Stroll Tonal
- Knit Picks – Stroll Hand Painted
Splurge worthy Sock Yarn for Knitting
If you want something a little more on the luxury side here are my favorite splurge worthy sock yarns.
Check out other FREE sock knitting patterns!
Shimmer Socks – FREE Easy Colorwork Socks Knitting Pattern
Description:
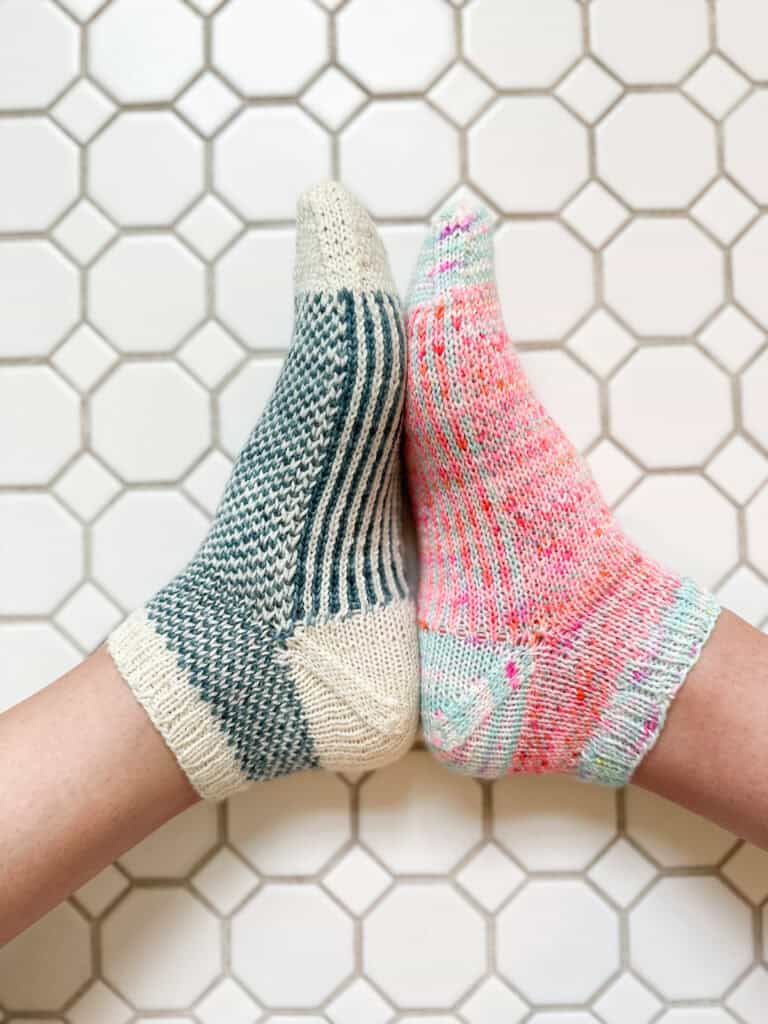
Named for the way the sun shimmers off the ocean, the Shimmer Socks are a modern take on traditional fair isle designs. They feature a meditative 2 color repeat throughout with a pop of stripes on the sole. These socks are knit from the top cuff down to the toes and feature an afterthought heel. The colorwork is both written and charted.
Helpful videos for knitting these socks
Note: Afterthought Heel
This sock is custom fit to your foot length. In order to get the proper fit I recommend knitting your heel before your foot is finished. This way you can easily try on your sock to get the best fit.
Note: Charts
There are two different simple charts for this pattern. After the cuff is knit, Chart A is used for the ankle. Then once the waste yarn is placed for the afterthought heel the Sole Chart is used for the bottom of the foot and Chart A is used for the top.
SIZES: S (M, L, XL)
6 (6.9, 7.5, 8.4)” 15 (17.5, 19, 21)cm leg circumference to fit US Women’s shoe sizes 7 (8, 9, 10); meant to be worn with approx 15% negative ease.
[Sample is shown in size S.]
Materials:
Fingering weight yarn in the following yardages
- MC: 160 – 190 yds / 146 – 174 m
- CC: 72 – 112 yds / 66 – 102 m
SUGGESTED YARN
- Summer Camp Fibers – Marshmallow Sock (Use my code WHIMSYNORTH at check-out for 10% off. This is the yarn I used for my second pair of socks)
- Knit Picks – Stroll (This is the yarn I used for my first pair of socks. I love that there are tons of colors to choose from and it’s very soft.)
- Knit Picks – Stroll Tonal
- Knit Picks – Stroll Hand Painted
- Hedgehog Fibers Socks Yarn
- Sweet Georgia Tough Love Sock
- Madelinetosh Tosh Sock
- Malabrigo Sock Yarn
OTHER TOOLS NEEDED
- Gauge Needle: US 2 (2.75 mm) — DPNs, 36″ circular for magic loop or 10″ circular needle, or size necessary to obtain gauge.
- Small Needle: Size US 1 (2.25 mm) DPNs, 36″ circular for magic loop or 10″ circular needle— one size smaller than Gauge Needle.
- Tapestry Needle
- 1 Stitch Marker
- Scissors
- Colorwork Chart Keeper – Optional
- Waste/Scrap yarn
- The Knit Kit – My FAVORITE knitting tool. I keep one in each project bag! Click here and use my link for 10% off your order of $25 or more on The Knit Kit and Summer Camp Fibers entire shop!
Gauge:
40 sts and 28 rnds = 4″ / 10 cm in chart, blocked
Glossary:
OR – Beginning of round
CC – Contrasting Color
CO – Cast on
DPNs – Double Pointed Needles
k – Knit
k2tog – Knit the next two stitches together (1 st decrease)
M – Marker
M1L – Make one left
MC – Main Color
p – Purl
PM– Place Marker
Rep – Repeat
ssk – Slip, slip, knit (1 st decrease)
sl – Slip
st/s – Stitch/es
Shimmer Socks – FREE Easy Colorwork Socks Knitting Pattern
CUFF
With smaller needles and MC, CO 60 (69, 75, 84) sts and join in the round, being careful not to twist your stitches.
Round 1: *K2, p1; rep from * to BOR. Continue in 2×1 ribbing until cuff measures 0.75″/2 cm.
Next Round M + L only (S + XL move onto leg)
M: *K2, p1; rep from * to last three sts, k2tog, p1. [1 st decreased, 68 sts total]
L: *K2, p1; rep from * to last three sts, *k1, m1L, k1, p1. [1 st increased, 76 sts total]
LEG
Change to Gauge Needle.
Knit 1 round with MC.
If you prefer to work from a chart, work rounds 1-2 of Chart A, seven times (Total of 14 rounds). Or use written instructions below.

Round 1: *K1 with MC, k1 with CC; Rep from * to end of round.
Round 2: *K1 with CC, k1 with MC; Rep from * to end of round.
Repeat rounds 1-2, seven times. (Total of 14 rounds).
AFTERTHOUGHT HEEL PLACEMENT
Using your waste yarn, knit across the first 30 (34, 38, 42) sts in stockinette. Next, transfer all the sts you just knit with waste yarn from your right needle back to your left needle. Knit in pattern with MC and CC across those sts using the Sole Chart. Place a stitch marker to note the separation between the top of the foot and the bottom/sole. Finally, knit across the remaining 30 (34, 38, 42) sts using Chart A, Round 1.
Now your waste yarn is placed and you can move onto the directions for the remainder of the foot.
FOOT
For the rest of the foot you will be knitting from the first marker to the second using the Sole Chart, then from the second marker to the BOR using Chart A. Continue knitting from these 2 charts until your foot reaches your desired length. See notes section for fit.
Round 1: *K1 with MC, k1 with CC; Rep from * to next marker, sm, k1 with CC, k1 with MC; Rep from * to end of round.
Round 2: *K1 with MC, k1 with CC; Rep from * to next marker, sm, k1 with MC, k1 with CC; Rep from * to end of round.
Note: Per the notes section, I like to knit my heel before I finish the foot and toe so that I can get the best custom fit. To do this, I knit 2-3″ of my foot, then knit my heel in order to keep my foot needles out of the way of my heel needles. Once my heel is finished, I knit the rest of the charts until my desired length.
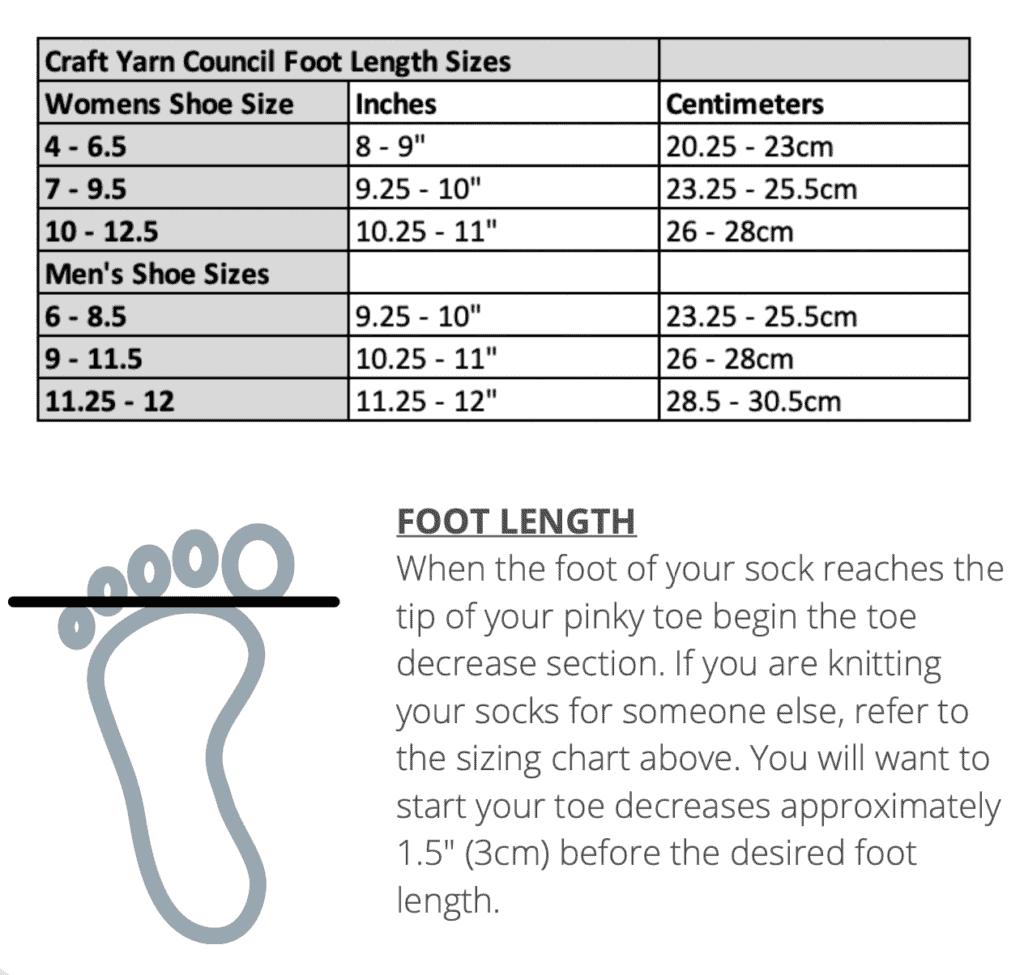
TOE
Once the foot reaches your desired length, break CC and pick up MC and smaller needles to knit your toe. See schematic on page 4 for the Craft Yarn Council standard foot lengths measured from the back of your heel to the end of the toe. You can also measure from your waste line, or if you are trying on your sock, the waste yarn line should line up with the center of your heel. I start my toe decreases when the foot of my sock reaches the end of my pinky toe. See page 4 for diagram.
Knit one round in MC.
Round 1: K1, ssk, k to 3 sts before marker, k2tog, k1, slip marker, k1, ssk, k to 3 sts before BOR, k2tog, k1.
Round 2: k
Repeat rows 1 and 2 until 24 (28, 32, 36) sts remain. Use Kitchener Stitch to graft toe sts closed. Kitchener Stitch video: https://www.youtube.com/watch?v=W7i5JwEReW0
HEEL
Your heel will be knit using smaller needles and MC. To begin you will first need to get your heel stitches back on your needles. You currently have half of your stitches knit onto a strand of waste yarn. Pick up those stitches above and below your waste yarn, plus an additional stitch at the end of each side, giving you 64 (72, 80, 88) total sts on your needles.
Note: Make sure your sock is right side out when picking up sts. Start by picking up the stitch just before and below the beginning of your waste yarn. Then pick up the right leg of each stitch across bottom side of the waste yarn ending with the stitch just below and after where the waste yarn ends. Now you have the bottom half of your heel stitches picked up. Repeat these steps for the stitches above your waste yarn. Once all stitches are picked up you can remove your waste yarn. I like to use the magic loop method for my heels and find moving my stitches onto the cord makes removing the waste yarn easier.
Round 1: k
Round 2: K1, ssk, k 26 (30, 34, 38) sts, k2tog, k1, pm, k1, ssk, k 26 (30, 34, 38) sts, k2tog, k1.
Round 3: k
Round 4: K1, ssk, k to 3 sts before marker, k2tog, k1, slip marker, k1, ssk, k to 3 sts before BOR, k2tog, k1.
Repeat rows 3 and 4 until 24 (28, 32, 36) sts remain. Use Kitchener Stitch to graft heel sts closed. Weave in ends and block!
Now you have a cozy and fun free easy colorwork socks knitting pattern! Check out more of my FREE knitting patterns on the blog HERE.
I would love it if you took a moment to upload your projects to Ravelry or Pin this pattern to Pinterest so you can share it with friends! Also, don’t forget to share your knit hat on Instagram so I can see what you make! Us the hashtag #shimmersocks and tag @whimsynorth


 Well after 2 weeks of every kid getting sent

 NEW FREE PATTERN!!!


 Last-Minute Gift Givers, This One’s for You
